
09 · Foundations
Supply & Demand Zones
Wider than a line, and built on unfinished business left behind by the last big move.
Price only moves for one of two reasons: the market is balanced, with buyers and sellers roughly agreeing on value and trading sideways, or the market is imbalanced, with one side overwhelming the other and leaving orders unfilled behind it. A supply or demand zone marks the origin of that imbalance — the last area of calm before an aggressive, one-directional move.
Charting a Zone
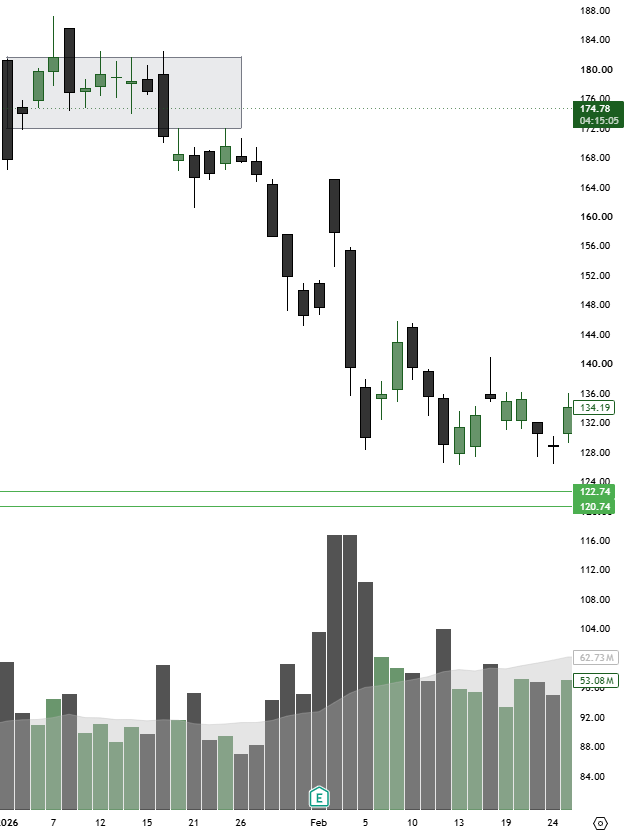
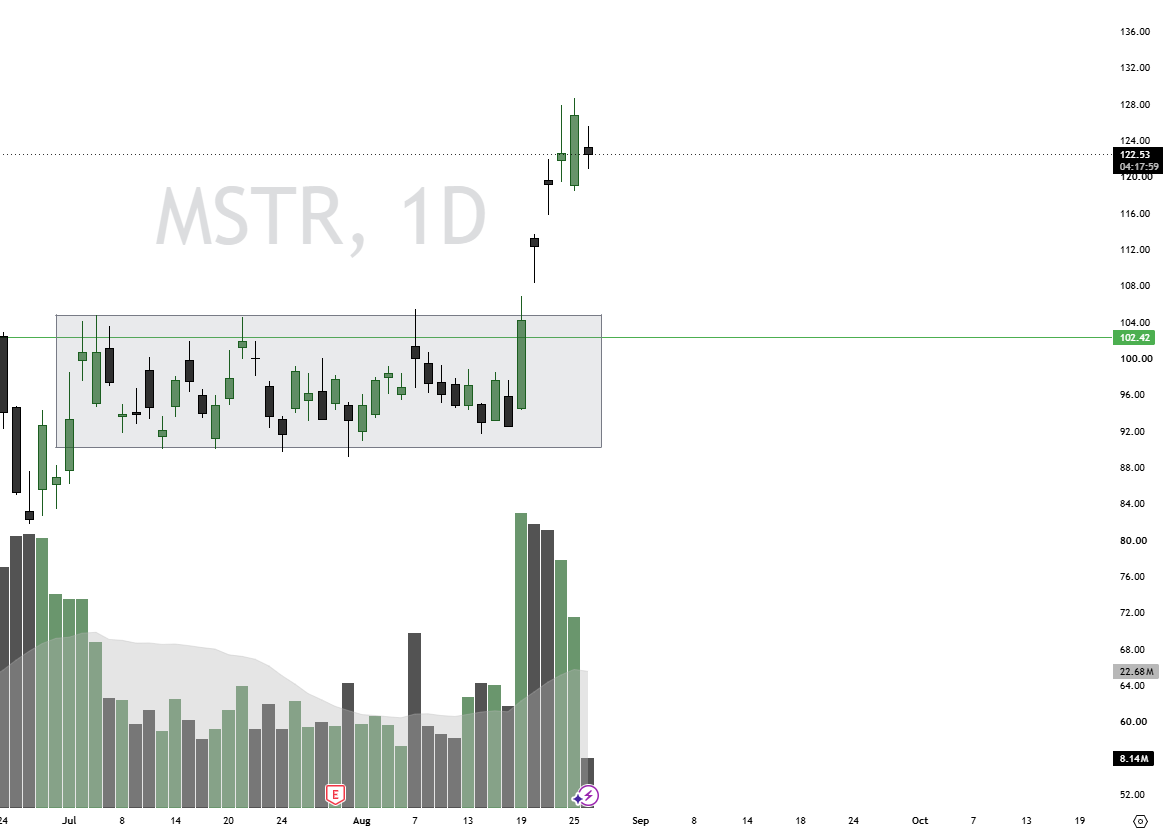
To find a zone, first spot a sharp, fast move on the chart. Then look immediately before that move for the small basing period price built before it launched — that base is your zone. Draw a rectangle from the body of the base candle to the far edge of its wick. Because the move away from that base was so fast, there is a good chance not everyone who wanted to transact at that price got filled, which is exactly why price tends to react when it returns.
Trading the Zone
Supply zone
Demand zone
Zones are wider and more forgiving than a single support or resistance line, which makes them especially useful in choppier markets where price doesn’t respect a precise price point but still respects an area. Because a zone can be traded on the reaction or on the break, it gives you a plan either way price resolves — that flexibility is what makes this one of our favorite tools in a sideways tape.